I have found that it is not that easy. One thing that would help is experience. So, when my nephew asked if I would help him draw the garage he planned to build, I readily agreed to help him.
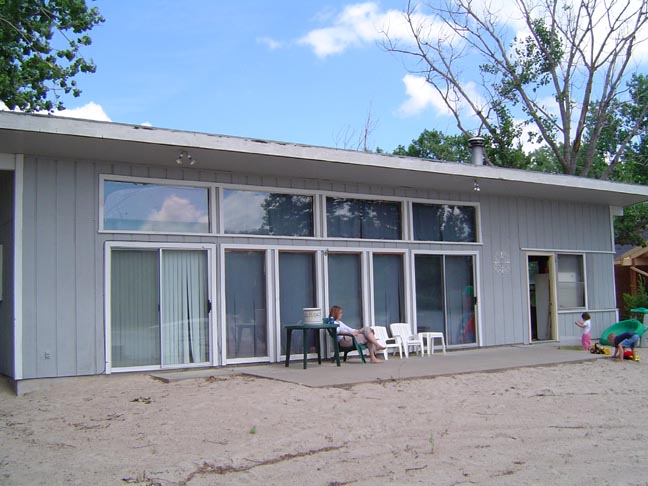
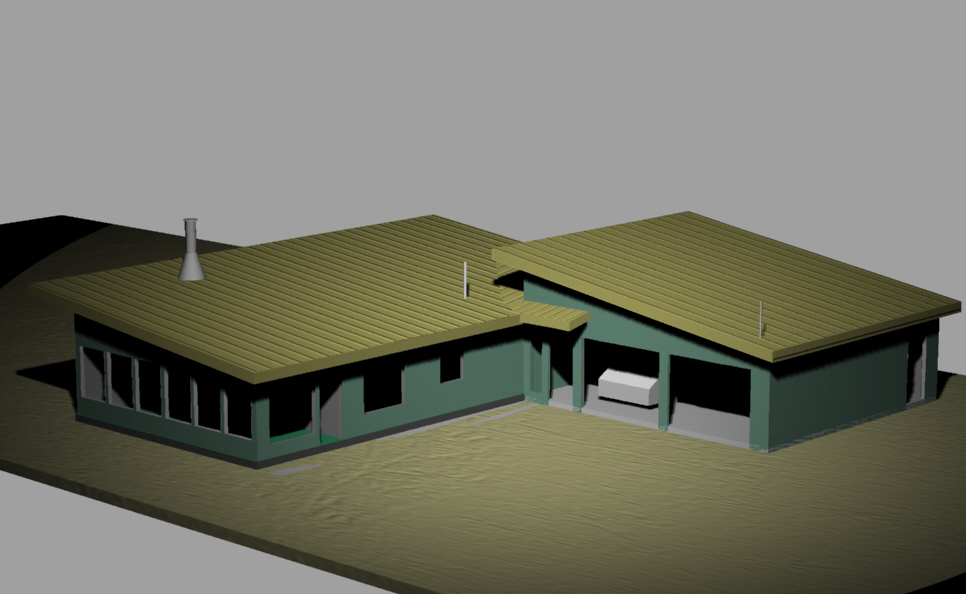
The original design of the cabin is a sort of pseudo-modern looking, simple, lakefront, slab on grade sort of stucture. Rectangular with a low sloping shed roof.
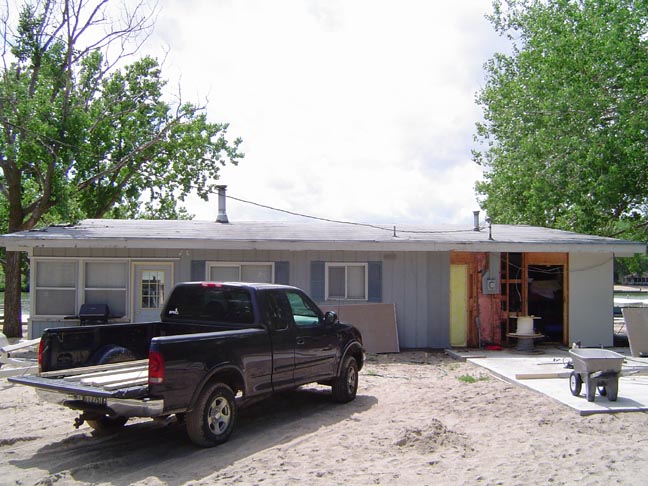
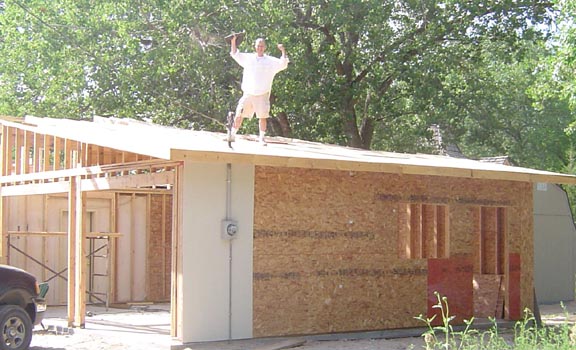
Before I heard anything about the project, the concrete for the footprint of the garage had already been poured.
Brainstorming
At first we drew a conventional 2-car garage with a reasonable sloped gable roof to see how it looked. It looked out of place. No matter what kind of roof went on this garage, one problem always came up. The low sloping roof to the rear of the cabin made it difficult to add an attached garage without making our own lake on the roof ( where the cabin roof drains toward the garage wall, or roof)
Design and proportion are important. I decided to try several different ideas about the roof. Rather than fighting the low shed roof of the cabin, or rebuilding it, I thought to replicate it, only adding a slightly greater slope. The project always got larger than desired when I tried to redirect the water away from the garage wall by designing a sloping roof in the opposite direction over the existing cabin.
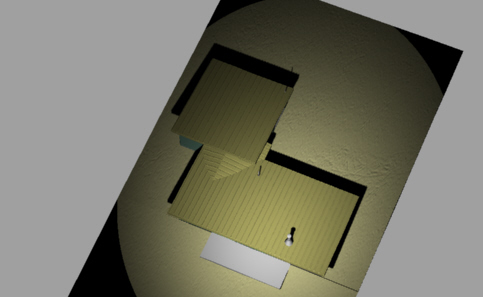
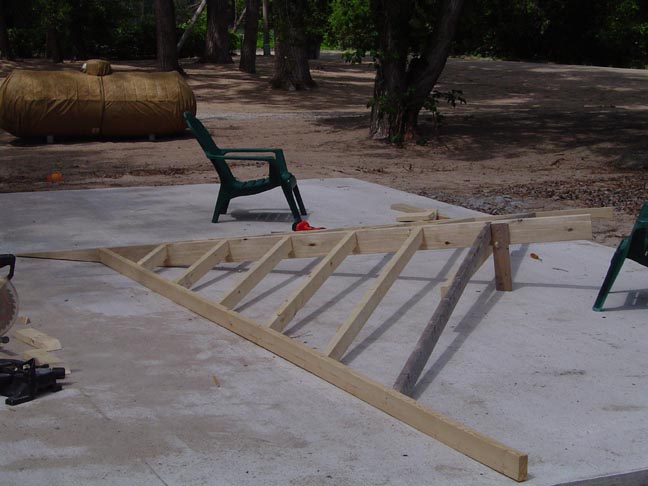
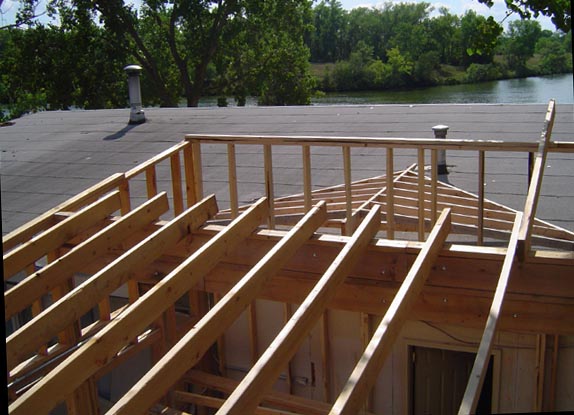
In the end, a roof that mickicked the original cabin roof was chosen, and I drew a 'saddle roof' ( a small peak to divert the water from the wall) that made two valleys and also wrapped around the front of the garage for a small overhang above the entry door.
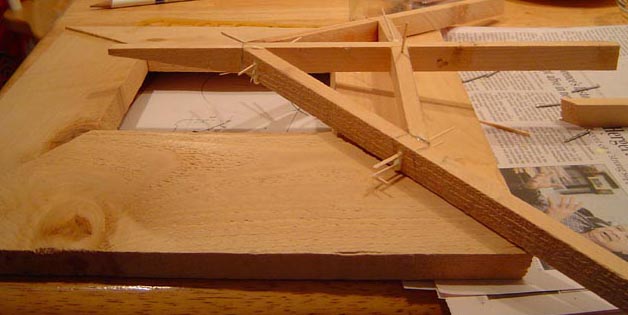
The garage slope is 2 in 12, and the original cabin slope is only 1.5 in 12, or 3/24. I drew up the framework for the 'saddle roof' and actually tested the angles out using a tiny model. I am sure that roofers have many short-cuts for calculating the angles in a roof frame, but it's fun to just approach it as a math problem. This method of testing is fairly quick and helps avoid frustrating problems on the job site in the hot sun, with other people watching.
A design view
The roof, with such a low pitch, was originally a 'built up' tar roof, covered by, If I remember right, limestone rock. That was a long time ago and now the asphalt roll roof is failing too. I am recommending a rubber membrane that covers the saddle roof and comes back at least 4 to 6 feet up-roof and then a metal roof surface on the whole roof ( taking care not to puncture the membrane in any lower areas. I am learning about both types of roofing for the first time, so this is great experience.
The framework will just lay onto the platform of the cabin roof and get centered on one of the 2x8 joists. The sheathing will span from the diagonal 2x4s that run along the valleys toward the real center of the valleys.

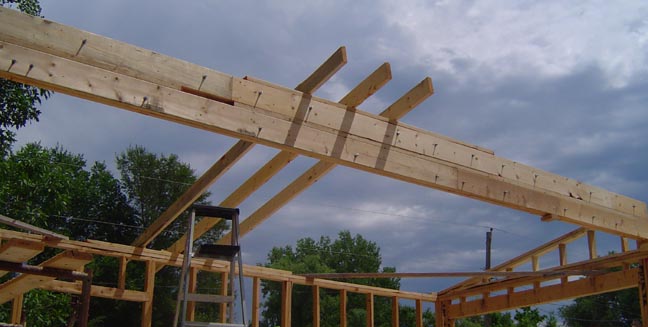
I settled on a built-up beam of 2x8s and 3/4" plywood. By just ripping a sheet of plywood into three 16" pieces, we make the webbing for the beam. Laying up a 2x8 along the top, and along the bottom, separated by a 2x2, we screwed together the 25' beam with only half the 2x8s on it.
After worrying about how we would lift it up, I remembered I had a couple of sections of scaffolding. This worked great. It was very wobbly at first, but as we fulfilled the promise of a 3.75 inch by 16 inch beam, with bolts all along it, it became stiffer and more solid feeling. We carefully lifted each side of it on to a scaffold, then each side up onto the frame, then we tipped it up! The other half of the boards we bolted onto the first half.
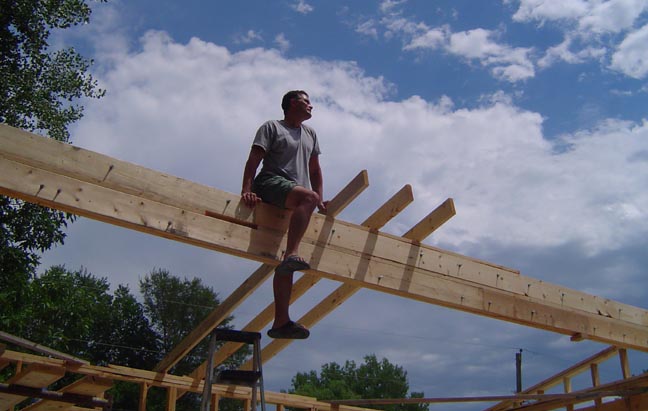
After getting the second beam in place, I started to notice the imperfections of the work that had been done thus far. It's very important to take a far view and make sure things are square, straight and level. In this case, the two beams really should have been the same length. In fact, I had to make the second one longer by roughly an inch.


That bow 'in' was not hard to fix. The opposite wall bowed 'out' and we just had to move the 2x4's propping it up and shove it over slightly. This tells me, we really need a brace under the beams to assure this won't reappear over time.
Some things are not the end of the world, but others are definite stoppers. The back wall was over two inches longer than the front wall. I was not there when they put down the first wall height and plate on the concrete, but I am paying for my absence now. I volunteered to fix the mistake. In my opinion, it is the only way to proceed, if that is an option. A person would have to work ten times harder to build it wrong, than to fix the mistake as soon as it's caught.
The last set of trapezoidal frames told the story. We built the triangular walls identical, yet they did not both land on the corners of the their 'parallel' and 'equal length' walls below them. It turns out, after a lengthy discussion, that some framers, contractors, etc. may be the type that would try to bury a mistake like this. I find that I am absolutely not in that group. The minute I see it, I am eager to fix the problem, even if it was not mine.
A good metal blade on a saws-all can work wonders in removing something that was built wrong, and I happened to bring mine that day. I would say that in an hour and a half, we saved many times that amount of work down the road, figuring out how to build it 'wrong' and make it look right.
Now alot of material can go up fairly fast, and I may even get to see the saddle roof attached correctly. I have an appreciation for the frustration architects must endure daily while dealing with construction crews who may not realize how imperfections can sabotage a plan.
I have really enjoyed designing and helping build this project and I have learned alot. It's time to turn my attention to my own 'shed' and get busy on the land.
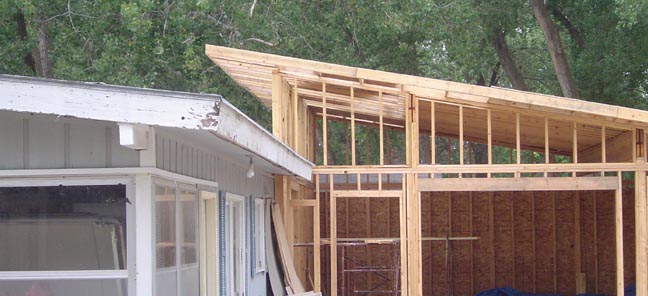
The front overhang faces the lake, as you can see from the topview. Today we finished sheathing the roof. I really like the height and the appearance of the two beams inside the garage space. It would be great to leave it all open like it is, oh well.
Next I am going to place that saddle roof where it will create two valleys. The front valley will come to the inside corner of the existing overhang and the new overhang above the entry door on the south face of the garage. It worked out that the saddle roof centers itself on a joist and above the door into the cabin.