|
|
The Toothpick Bridge
|
A friend of mine asked me to help her son
with the classic math/science project, the
toothpick bridge.
At the time, I remembered
my dad's explanation of a catenary and I
decided to look into that curve as a building
block of the design.
The catenary is curve
made by a hanging chain. A fancy description
would be the 'shape assumed by a rope or chain
of uniform density suspended from two points and
acted upon solely by the forces of gravity.'
The Saint Louis arch is the shape of a catenary.
At that time, we designed and built the bridge, but
in the interest of getting it built, we did not use
the formula for a catenary, I think we simply dangled
a chain ( like the ones the pens are attached to at
the bank) in front of a posterboard and drew the curve.
When my son came home from 8th grade with the same
assignment, I thought I would document our process on
a web page.
A school project, usually assigned in a physics class, or math class for junior high
or high school students, The "Toothpick Bridge" problems tests the reasoning skills
of kids and future engineers.
|
The Toothpick Bridge-Design
|
 |
|
|
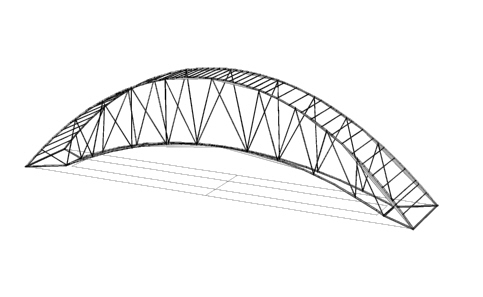
The design relies on the four catenary arches to transfer the weight of
a load to the four feet on each side of the bridge. They work in tandem
like a regular truss with struts that connect the upper arches to the lower
archs. The formula for a catenary arch is y=cosh(x). This 'cosh' function
is the hyperbolic cosine. A sort of obscure trigonometric function used
in non-euclidean geometry. Luckily, it's on many hand-held calcualtors.
A little Algebra...
To normalize the function, we needed to use a particular part of the curve
to get the height we wanted, and then magnify it to the size we wanted.
This involve a little algebra.
Essencially , the lower arch and upper arch
are from the same function for a curve, only the upper arch uses slightly
more of the curve ( to get the proper height ratio) and is therefore less
'magnified'
A little Engineering...
I recently decided to calculate the forces in the struts of a typical
catenary truss. This page will give you a starting point and also an idea
about calculating the tension and compression involved in each member of
your bridge design. The numbers can help you decide which members to reenforce
the most, and how to design the connections with the idea of compression or
tension in mind. Here's the link
A little glue testing...
You know, I really put these pages on my website as an experiment, but since
so many people view the page, I thought I might try to resolve a question that
always arises when defining this problem. What are the strengths of the individual
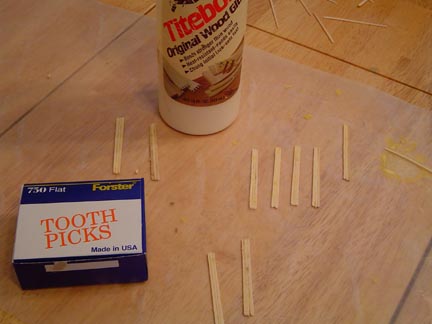
elements? Well, you have tiny sticks of wood, and white glue.
Well, I needed glue for woodworking anyway, so when I went to Lowes to buy
the glue, I thought,"hey, why not buy several types -- and test them to see which
one is the strongest!".
I was very surprized at the outcome. Something also occurred to me while doing the test. Roughly 400
people visit my site per day, but noone has lifted a finger to help me fund this little
internet adventure. So, anyone who makes a paypal donation to my site will get an email from me
telling which brand performed best and worst in my glue test. It is a non-sanctioned test
I have done of my own accord. The results were surprising and counter to what I expected.
So, without further ado, I give you, the...glue test.
|
The Toothpick Bridge-Construction
|
 |
Construction technique is of great importance to success.
|
Start with uniform building blocks
|
 |
|
|
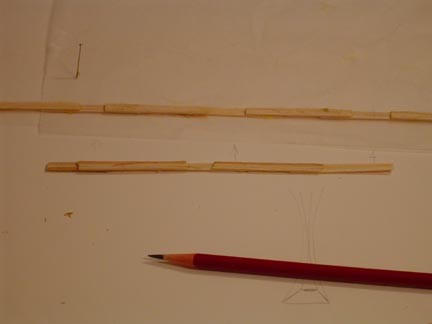
I decided to make easier building blocks by first gluing toothpick 'head to toe', as it
were, and by putting the fat end and the skinny end together, we get a uniform width,
flat, and stronger, building block.
|
|
Start connecting the blocks
|
 |
|
Make longer pieces from the building blocks.
|
|
Many Many toothpicks are needed.
|
 |
|
Starting to form a catenary
|
Construct the framework.
| |
|  |
|
Every glue joint is important. Think of each place where building
blocks are glued together as 'rivets' in your bridge. In the most
efficient design, every part of the bridge is acting on the force
of the load. If the bridge is overdesigned, then sloppy workmanship
will suffice. There is a balance between design and safety. With
modern computing and engineering techiniques, some designs actually
fail because they forgot some subtle force, such as wind. The Tachoma
narrows bridge failed when high winds caused it to oscillate. The
footbridge over the Thames was closed when we visited due to a design
fault.
|
Now to assemble the parts.
|
 |
|
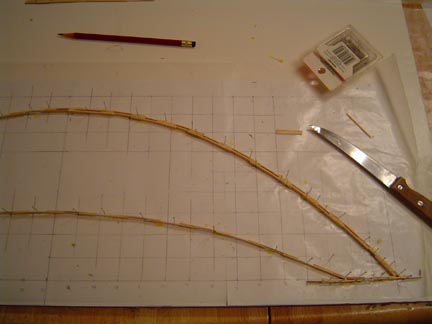
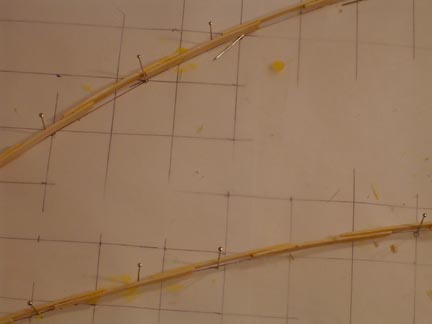
By printing out a grid against the curves we wanted to make,
we drew it to scale and sketched the curves onto several pieces
of printer paper taped together. By laying waxed paper over that
and using pins, we pinned the design and wax paper to a piece of
'foam core' ( get this at an art supply store). More pins can be
used to bend the long straight piece along the desired curve.
 |
|
|
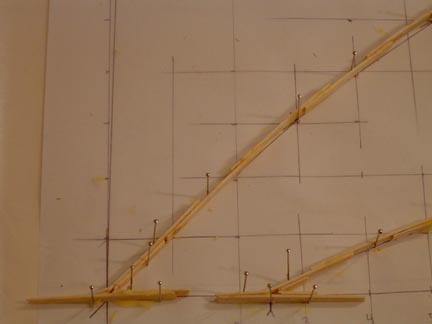
Pinning the arches to the foamcore allows the first connecting
pieces to be added, assembling a 3d framework. The first 'flap'
of the struts between the arches were assembled while still flat.
|
 |
|
|
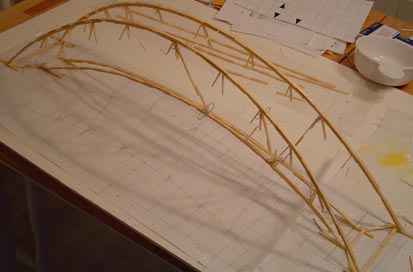
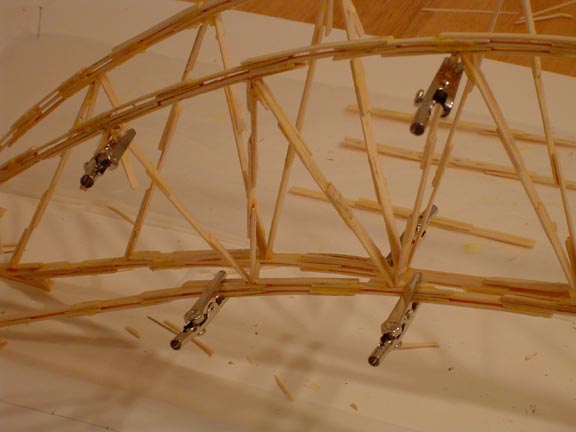
Pins, waxed paper, and now paper clips are a great help to holding
things in place while the glue dries. The glue outside the joint
is just for show, it really doesn't enhance the strength of the
connection. When working with 8th grade level construction crew,
one has to let go.
|
 |
|
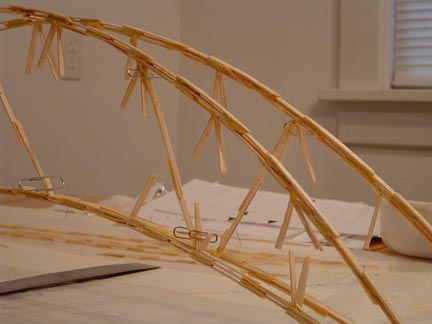
A trip to RadioShack gets us an amazing ally in the fight for
great glue joints. Alligator clips! They hold the struts to the
flaps and in this design, where the struts are not in the same
plane as the arch, it was a quick way to make the connection.
|
 |
|
At this point the bridge still weighs less than 100 grams. The
weight limit for this set of rules was 500 grams. The first bridge
I helped out with actually was disqualified for being too light.
|
 |
|
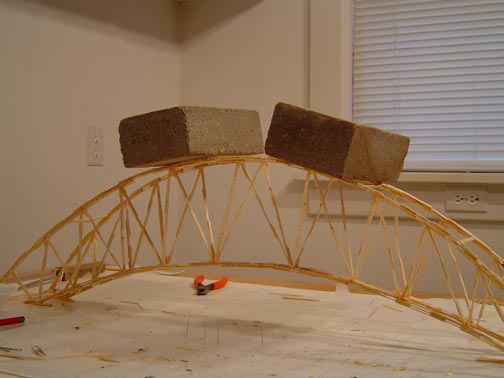
With all the struts, this toothpick bridge weighs 86 grams. To test
its connections, we add weight to it.
one brick,yes -- two bricks, yes, -- three bricks, yes,-- four bricks, hmm, maybe,
maybe not -- five bricks, definitely NOT (yet)
|
 |
|
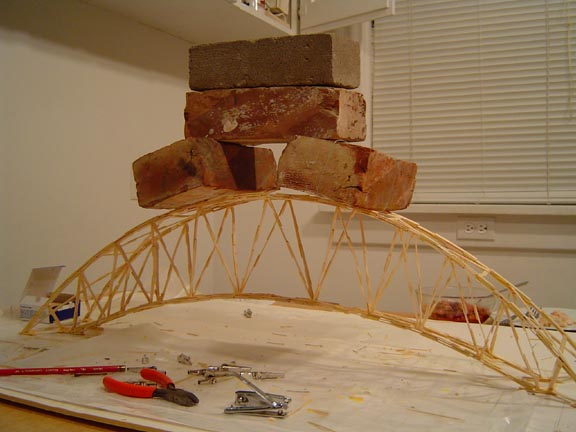
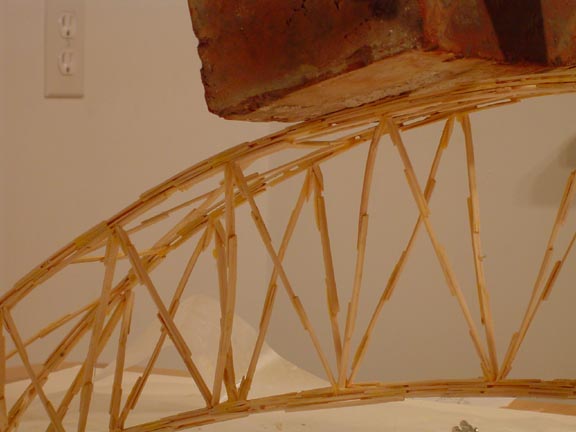
After adding some cross-bracing on the top, the span can finally
withstand the weight of four bricks. We notice that the struts start
to buckle. Our next step will be to beef up the struts.
|
 |
|
Well, it's time for the post mortem on our bridge. There are two vastly
different kinds of bricks. One day before the contest, my son told me that
his instructor was planning to use 'paving stones'. We had been testing
with ordinary bricks which weigh roughly 5 pounds each. We 'beefed' it up
to where it could easily withstand the weight of five normal bricks.
Pavers have to weigh about 10 pounds each.
I am disappointed with the methodology of the bridge test. By loading bricks
on top of students work, the instructor misses out on a great teaching
opportunity. What is important to learn is what makes a good design, and
what are the 'weak points' in the design. To find this, one must use finer
methods of testing. For example, a bucket tied 1 inch off the floor from the
span would allow one to learn from the failure and fix it accordingly.
Crushing the work with bricks is entertainment, not unlike a monster truck rally.
The bridge held 3 pavers and then collapsed on the fourth.
The bridges weight was slightly over 1/5 of the maximum weight limit. One thing to
learn is to take advantage of every opportunity the rules allow. Use every
bit of the weight if your goal is to win the competition.
If your goal is to learn the physics of bridge design, don't enter a
competition where 'lamination' into one giant board is allowed -- that is,
unless you love the feel of elmers glue on your fingers.
One very important concept that was apparently lost on my son's classmates
is the ratio of the bridges weight ( unloaded) to the load that the bridge
could withstand before failure. So far I feel sufficiently humbled to have lost
two toothpick bridge competitions for two trusting students. Always too light!!
One note for the future. Luckily I have other children who will benefit from
our knowledge. The next design will be far superior to this one. This bridge
failed because the joints between the arch and struts failed. By orienting the
building block so they are 'flat vertical' the strut connections will be much
easier to make strong.
All in all, I am sure my son learned more with my help, than he might have
without it. I do wish he could have gotten the highest possible score, but
I have found that getting all A+'s is not necessarily the most useful grades
for later in life.
|
A different set of rules arose for a father in Quebec, who was kind
enough to send me his story. See how different this task can by visiting
Round Toothpick story
In searching for the best design, there are a few things to consider.
Since every competition is slightly different, decide what your goal is,
to learn, or to win? I have started a page which will may eventually answer
the question of how best to support heavy weights in toothpick world.
Quest for the best
While you're here, let me know what you think of this page in an
email.
If you would be interested in more detailed instructions
or other designs, let me know that as well. I would like to hear
about the rules for various contests and how the grading and
testing is done. My name is
and just click on it for my email.
|
|
|
|
|Home|
|Pi details|
|About stone|
|The Inventions|
Music Store|
|More Hugh|
|

 Lars' Creative Warehouse