|
Over the years, there have been several TV shows that catch our attention. Of course, Seinfeld,
but years ago, it was Newhart. The theme by Henry Mancini, and the dry comedy was great.
In that show, Bob was a writer. His books were called "Shelf Help".
Never would I have imagined that I would one day write a page about that topic.
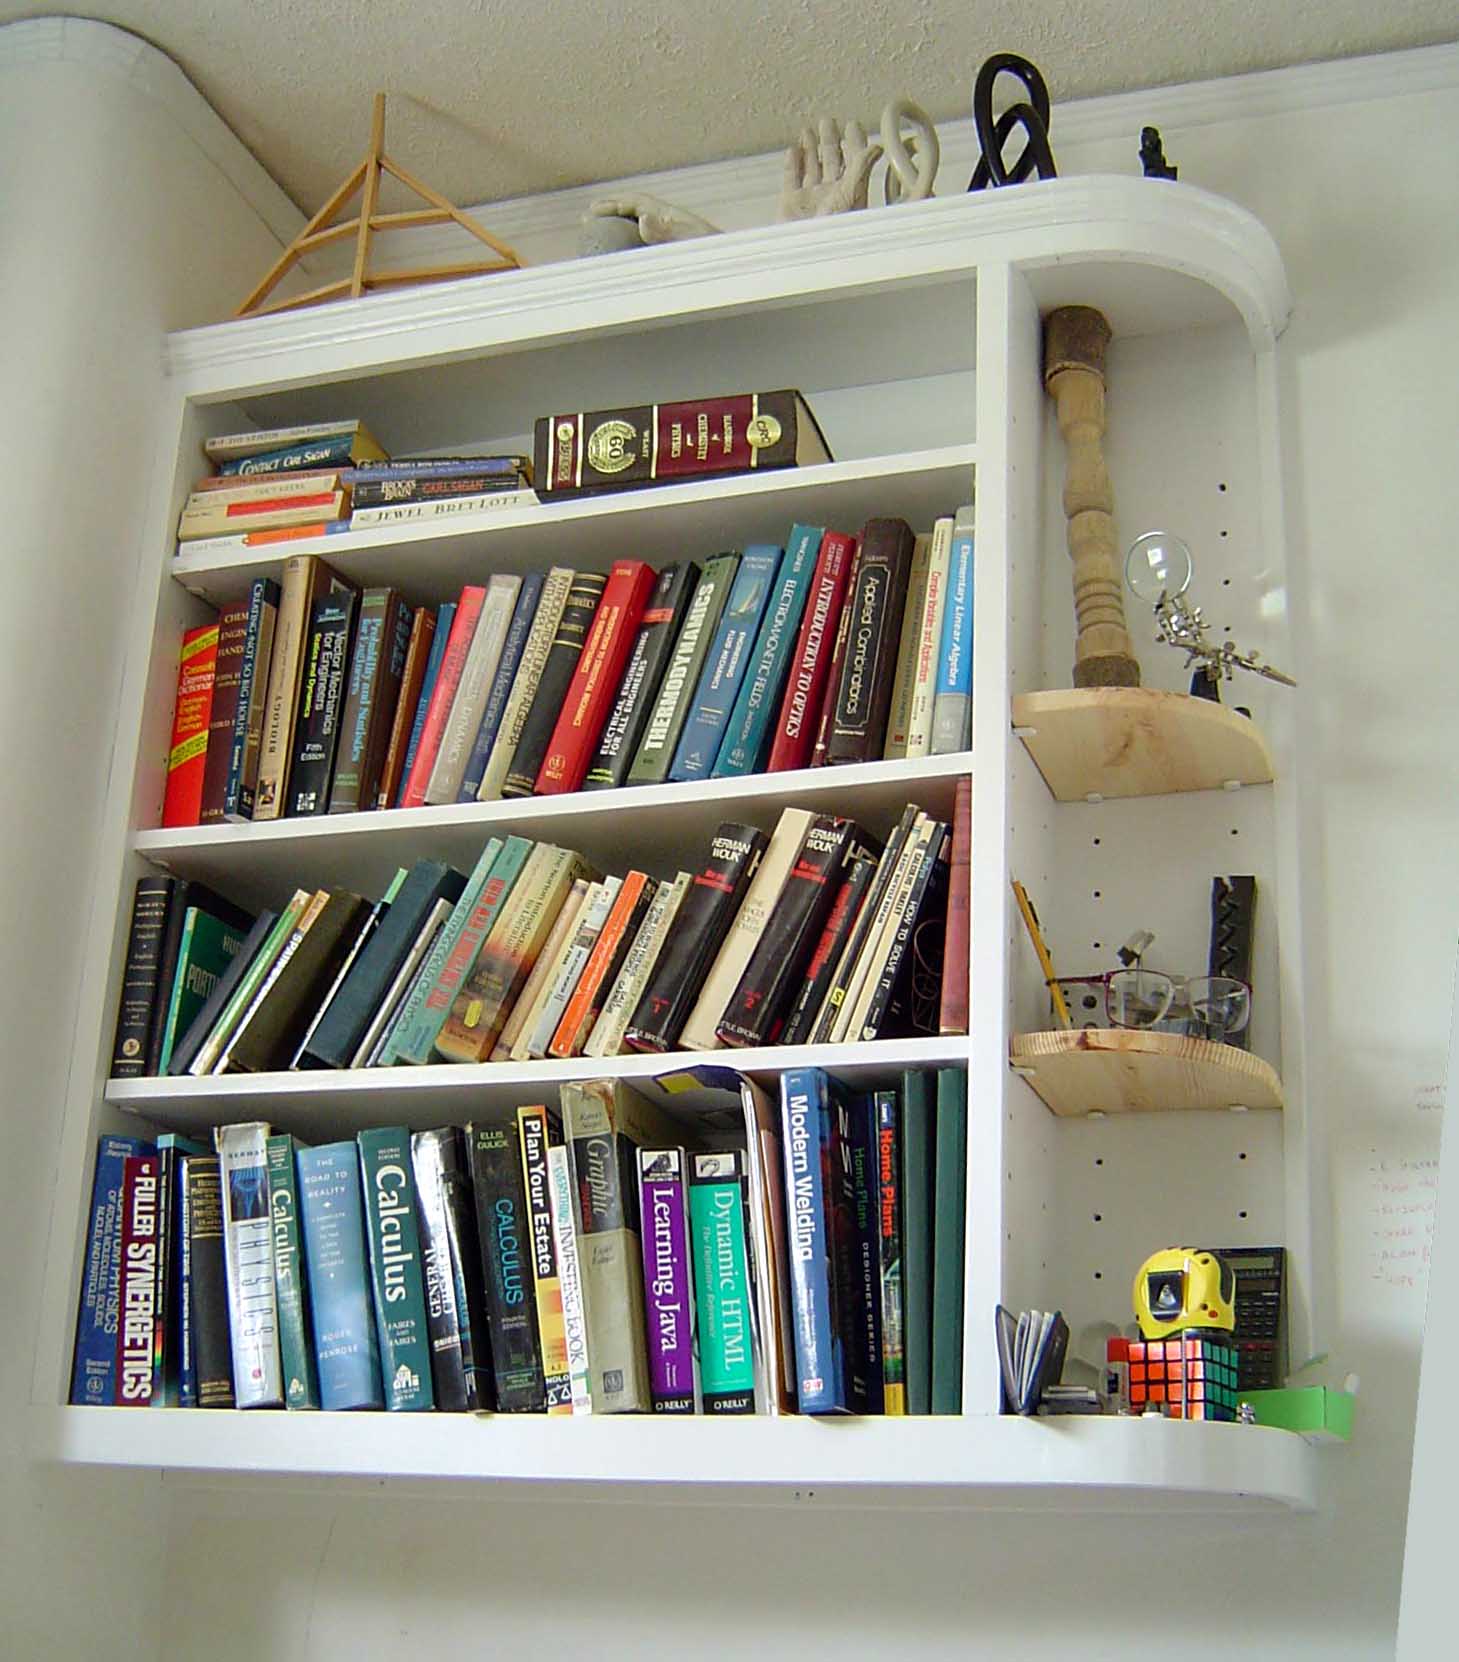
I have built many shelves, and this plan is emerging as the most useful.
After all, shelving is the best way to get things out of the way, and you not only want
places for books, but also for knick-knacks. The rounded edge, which gives a great appearance,
doubles as a place to set a few small items.
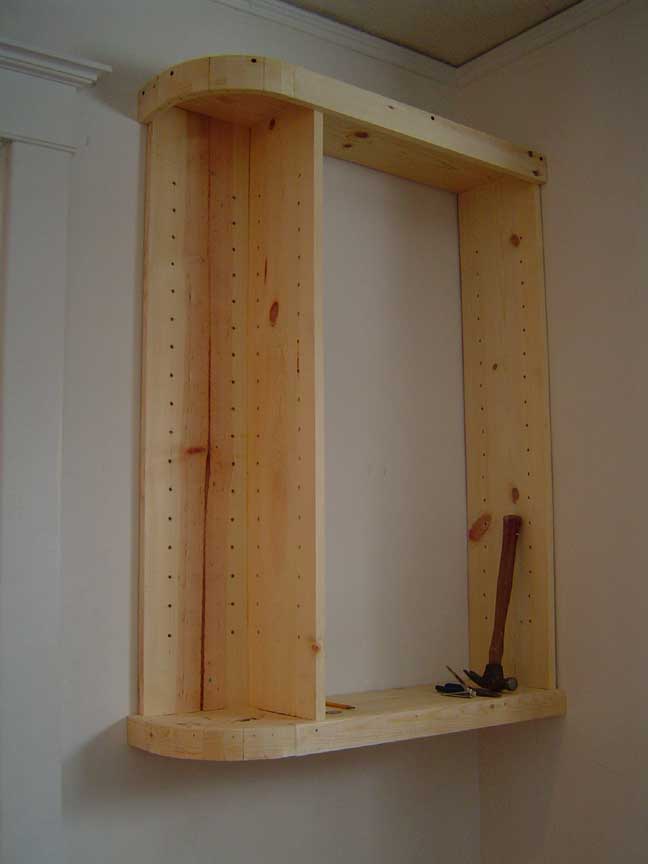
The basic elements are, top, bottom, sides, and shelves. The top, bottom, and sides have a
facing, which is like the woodwork around a window, it makes the transition from wall to
shelf. The sides have holes drilled every two inches to allow the shelves to be placed at
the desired height. The corner shelfs use a trick that I will reveal later.
|
|
Up Under Round

|
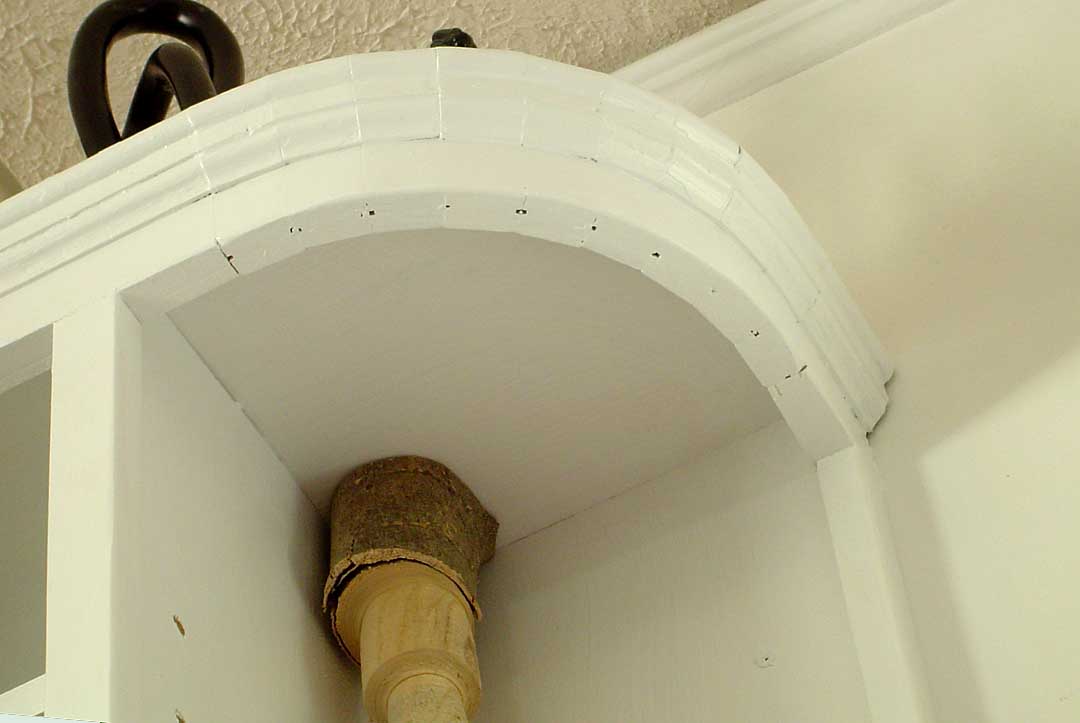
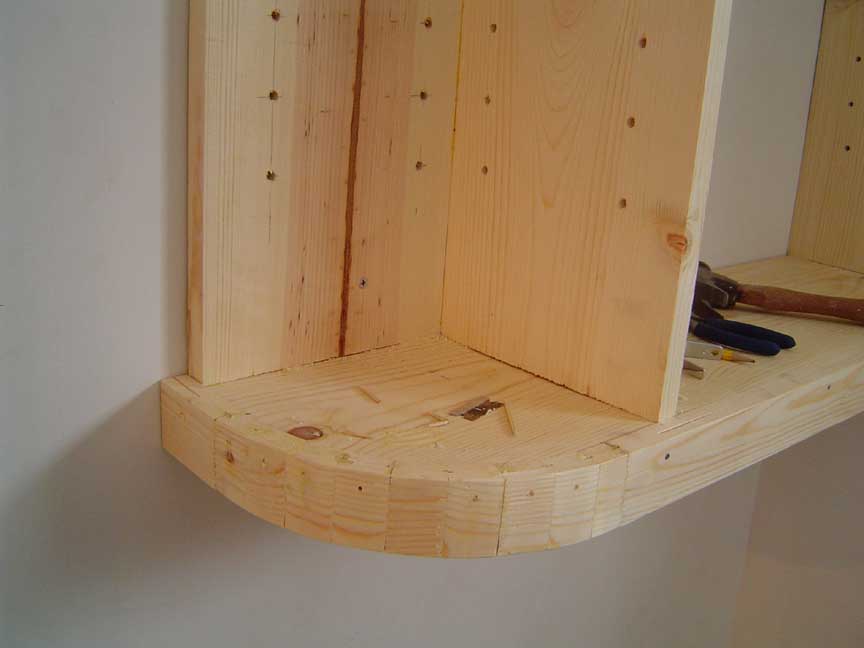
The rounded edges are made up of the same facing board, cut into small angled pieces, and glued together onto the top and bottom. A little sanding, filling, and painting makes any desired molding curve just great. I am not terribly particular about trying to make the individual pieces disappear, and there will always be a tradeoff between the flat facets of the pieces and the curve they are defining.
Accounting for the facing and the rounded edge, one can design a shelf for just about any space. For some reason, I am just drawn to a design with a rounded edge of some sort. This is the Pi Symphony site, after all.
|
Sand to Suit.
|
|
Since I plan to paint anyway, I start with fairly inexpensive pine boards, 1x10's end up being
wide enough for most books. The width of the sides and shelves are about 9.25". Add the 3/4" facing and the depth from wall face to cabinet face is 10". Nice and simple. The corner shelfs end up being 8.25" square with one corner rounded off to a 4" radius.
The end result is almost like a column on one or both sides.
Start by deciding how you want your finished shelf to be placed in the wall space. I used a 2.5" wide facing on top, and a 2" wide facing on the bottom. The verticals got a 1.25" facing. The height of the shelf is important because you might want to put a few things on top as a ledge. The width should fit with other things around it, like windows or door openings. Leave a reasonable space between things, or it may look amateurish.
|
Find a Stud to Hold it on the wall
|
|
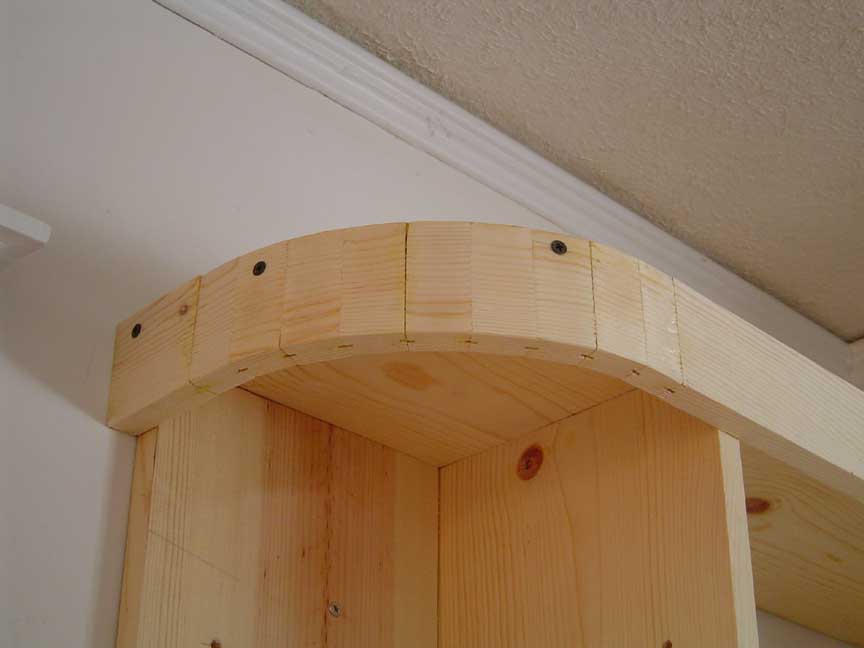
There are a few tricks I use on this process. When I put my pieces together for the round shelf,
I notch them using the table saw ( very carefully) with the joined faces down against the blade
set at the normal, 90 degrees angle, and about an 1/8" high. Making sure to notch consistently
from either the front face or back at about the center of each piece, the result will be a small
slot that will help hold the pieces together and allow you to assemble them onto the curve of
the top and bottom.
As a homemade biscuit ( what will the search engines do with that one?) you can cut thin
( 1/8" by 1/4" ) strip into 2" pieces to join the little arc pieces together. Trial and error
is the best way to get a good fit. You don't need them incredibly tight.
Another trick I love for this is to drill a small hole, say, 3/32" into each piece before
gluing onto the top or bottom face, and jam a toothpick and glue it into place. Later it can be
shaved off, sanded, etc. Helps hold all the pieces on.
|
|
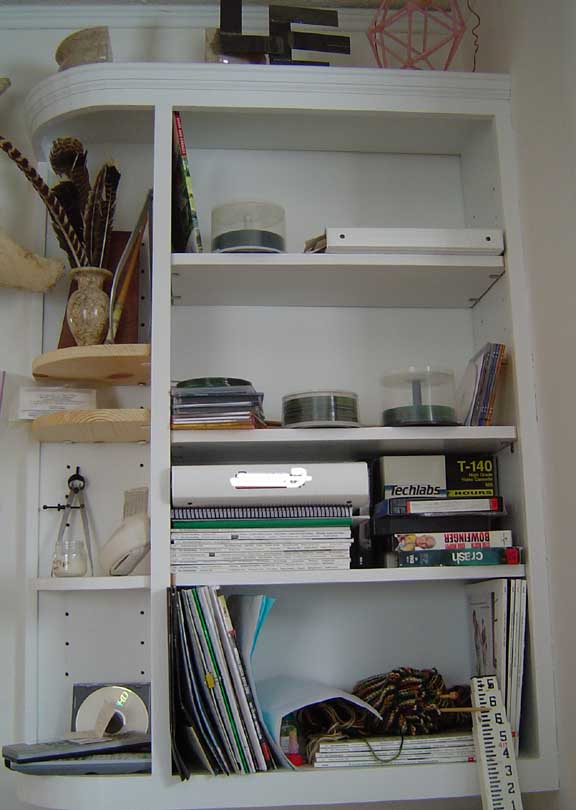
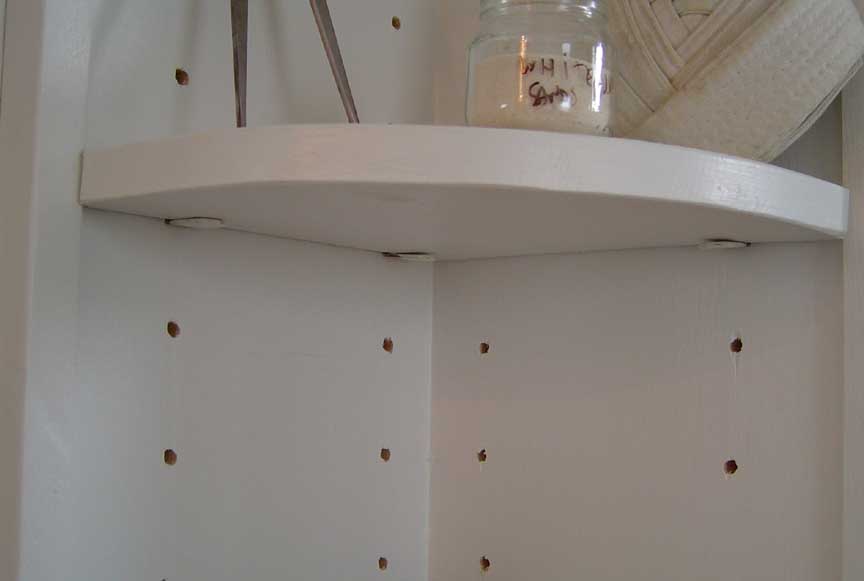
When you finally cut the rounded edge shelves, you may notice they have trouble staying on
with simple shelf bracket pieces. On my first version of this shelf, I just used a dowel to
hold up the shelves, and the corners did not stay at all. They were only supported on two
adjacent sides! So, I put holes above the shelf on one of the holes near the corner, then put
a peg to keep the shelf from tipping out.
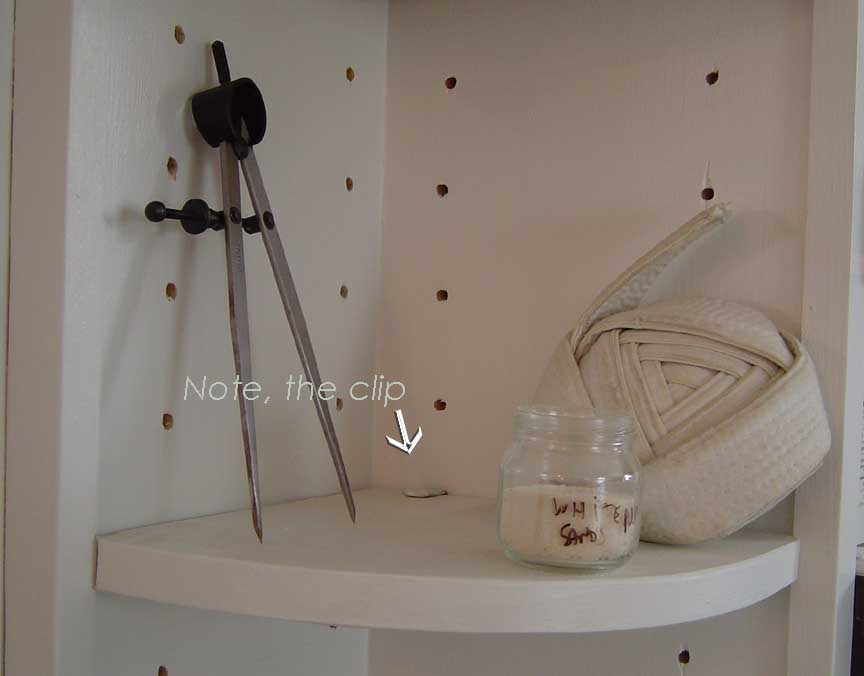
Now, that method is fine, and has no problem holding up the shelf and small items, but on the
next version, I perfected the scheme. Using the little metal clips that have an "L" shape metal
attached to a short 1/4" shaft to go in the hole, there is a great way to secure a 3/4" rounded
edge shelf from two adjacent sides. There are two parts to the answer.
One, make sure the shelf fits nicely behind the overlap of the facing on the sides, this
prevents the shelf from coming straight out to the front or the side. Two, using four clips,
put three below the shelf, and one of the corner clips flipped over so it holds the top of the
shelf from teetering up.
|
|

 Lars' Creative Warehouse