|
For a long time, I wanted to make our fire pit area a little nicer, so this year I decided to make a little wall along the front edge. The design become more elaborate, and since I have little experience with block work, I thought it might be pretty fun to try out.
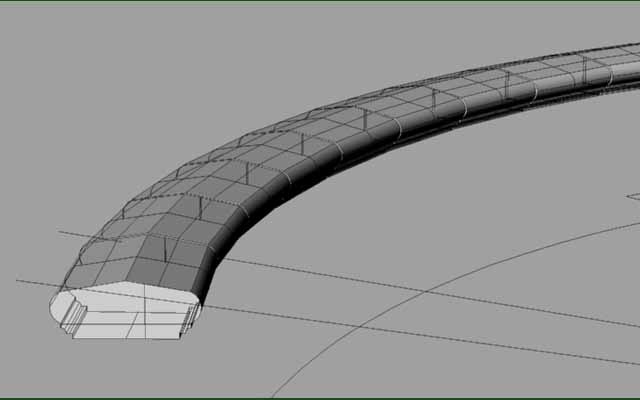
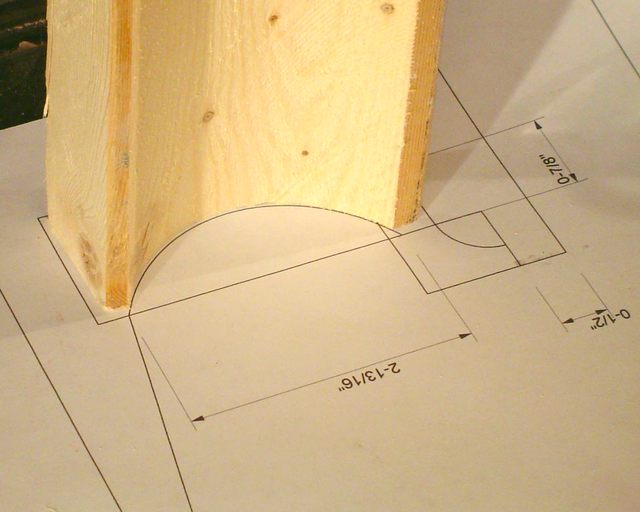
It might have been just fine with a simple cap, or none at all, but since I was putting some rather precisely placed columns around in a circle, I thought I would make each segment of this wall a 6° segment of the circular area.
|
The Form
|
Design First
I wanted to try out a technique that I found on a website recently for cutting curved depressions with just a table saw. The woodworker, Matthias Wandel, offers this technique and a thorough explanation as just one of many, many clever and insightful tips on his site, www.woodgears.ca
I think he is a genius.
As usual, I start out with just 2x4 dimension lumber. It may not be as dimensionably stable, but these forms will take a certain amount of abuse and need to be rebuilt anyway, so the extreme affordability of pine is great.
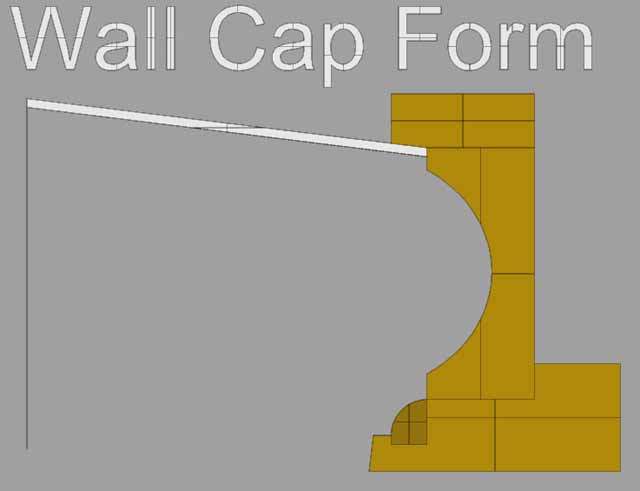
I will be making the profile in one long piece, then cut it in two and put a 3° angle on each side and house them on a piece of 1/2" plywood. The bevelled top will be formed with plexiglas inserts to give the top a very smooth and water shedding finish.
|
|
A Cool Cove Cut Technique
|
|
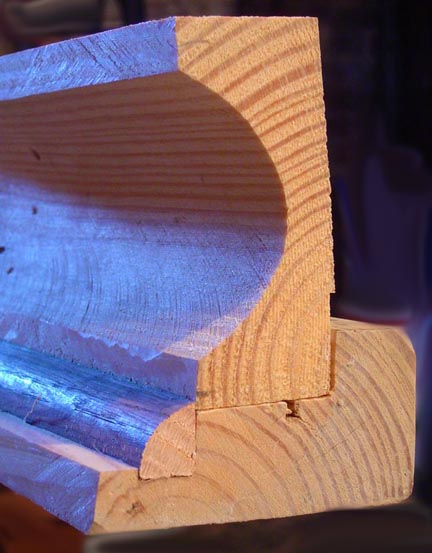
To make matters worse, I am actually using a used 2x4. These were used as form boards for the slab for the wood fired oven I plan to build.
As you can see, the 2x4 is notched and I have inserted a piece of quarter-round moulding that I happened to have laying around. It is oak, and with a few coats of varnish, it will stand up well to the rigors of concrete casting.
Few people will go to the extremes of making their own concrete forms for things like block walls and fireplaces.
The essence of any form is smoothness and surface. Some use body putty. I will sand and then seal with either coats of enamel paint or varnish. The more impervious the surface the better. Plastic works good. Plastic wrap can be used in some cases for a quick surface release agent, but aluminum foil is a definite 'not'. The concrete eats away the aluminum, literally.
For this form, several coats of oil based paint or varnish after sanding and wood filler should make it usable for the 10 or so castings. I might make foam inserts for the angled sides and then it can be used for a smaller radius circle for the fire pit grill area.
I want the pit to drain down the hill, so that the ashes will wash away in the rains and even add nutrients to the soil down the hill.
|
photo...
Construction.
|
|
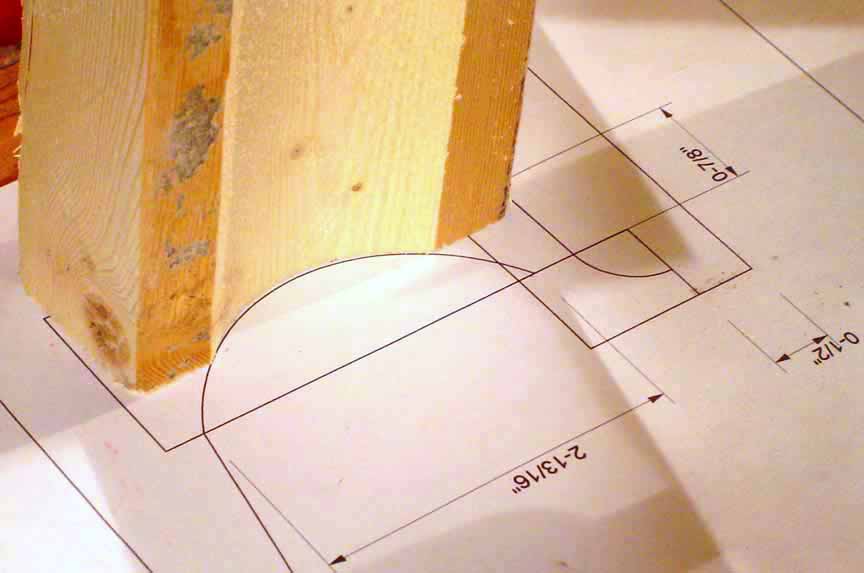
By measuring the diameter of your table saw blade, you can use the depth of your cut to determine the length of the chord across the blade that will do the ultimate cutting. By taking the ratio of that length to the desired width of your cut, you can determine the angle of your guide to the blade. In my case, the angle was about 33.5°
Just to check to see if I was on the right track, I just compare it to a 1"=1" printout of the drawing.
|
|
This rounded edge is cut onto one board, about a 1/16th of an inch at a time.
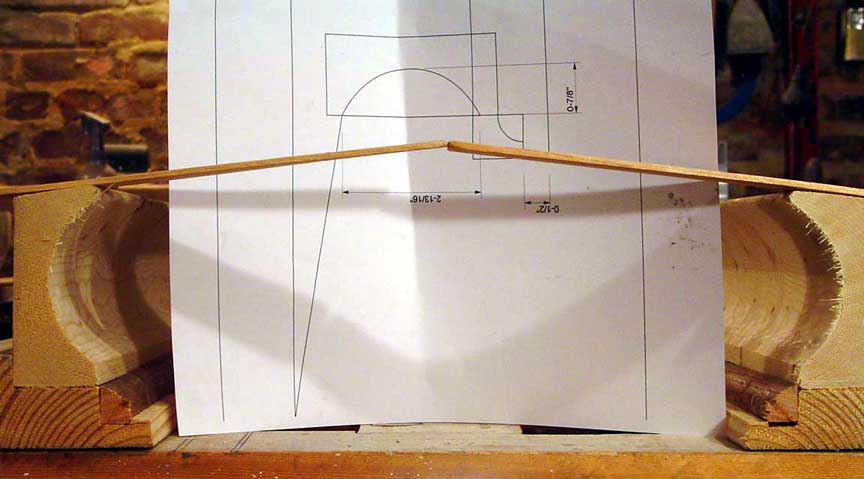
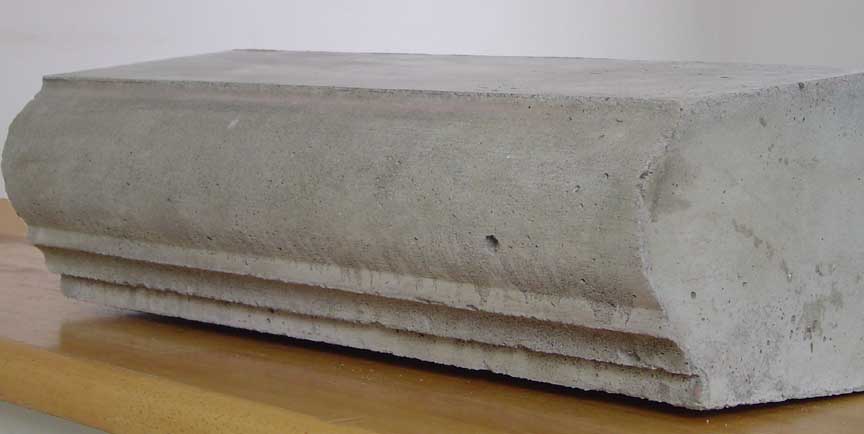
After getting it close enough, I bevelled the top to about 7°, and cut the roughly 42" pieces in half to make two sides. You can start to see the wall cap profile.
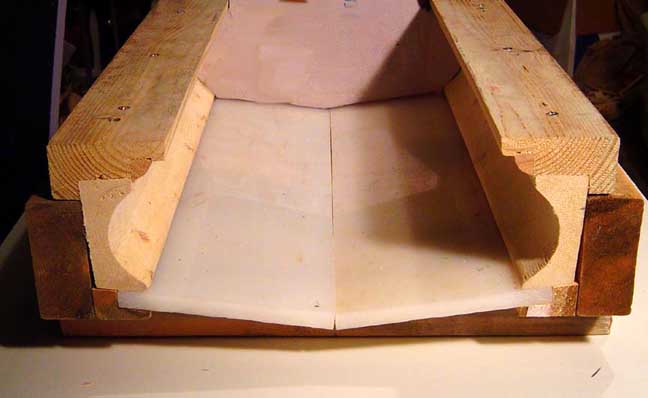
The next step is to glue the pieces together and rig up a few boards to hold the sides the right distance apart. The wall top will actually be cast at the bottom of the form against two angled pieces of plexiglass. With a line of tape down the middle, the need to be supported beneath and a piece of plastic will be folded up around all the form pieces, so even where things leak, there won't be a flow of fluid out of the concrete mix so that weak spots can be avoided.
|
click here to animate the framework
|
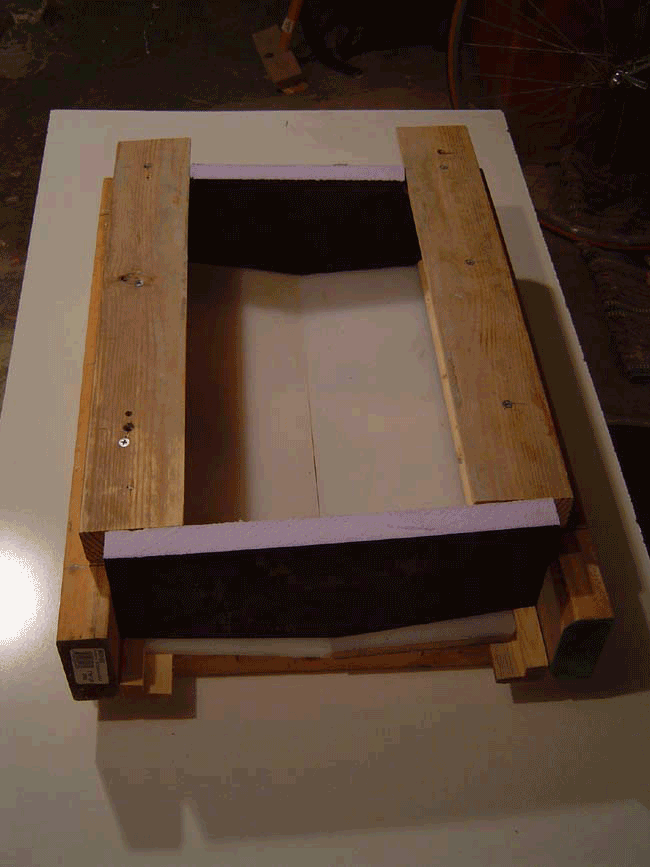
I happened to have some 1/2" plexiglass to use for a bevelled top. To hold it all together, I used some 2x4's 13 inches apart and cut some pieces to hold the plex pieces inplace at an 8° bevel.
Next step is to seal up and sand with oil based paint or varnish, and try filling it with concrete mix.
One nice thing about this set-up is that I can set the sides in with a filler board, and make any width cap, and the ends are cut from 1" styrofoam which can be adjusted to make any length of capstone.
|
 |
 |
 |
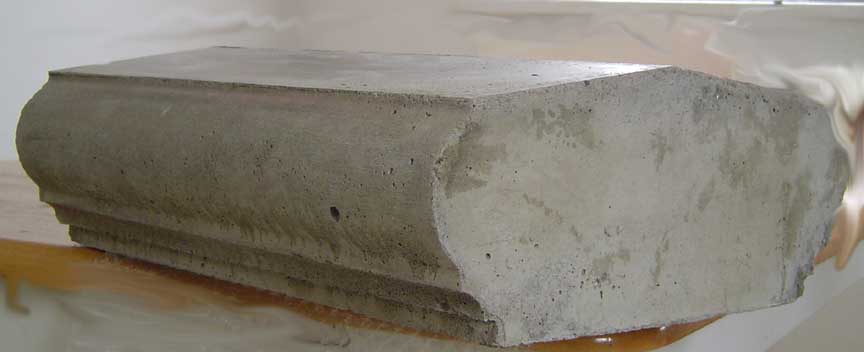
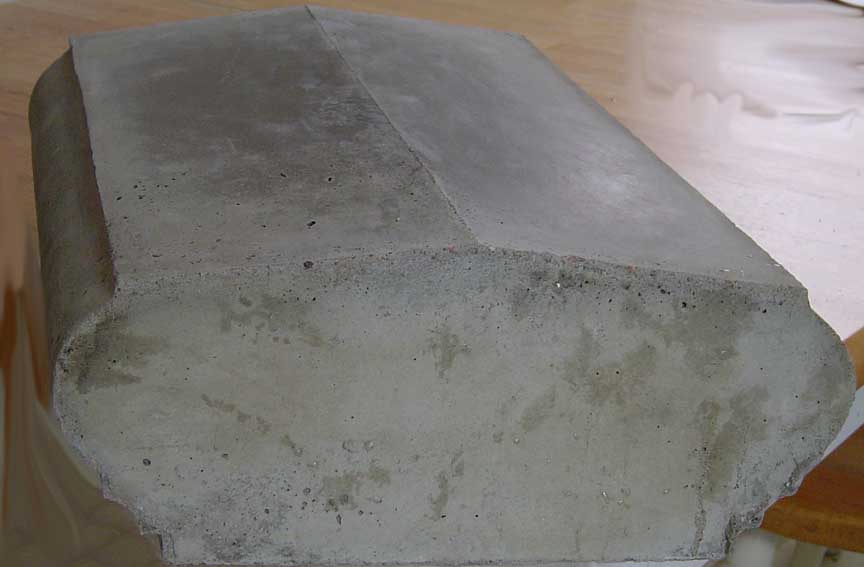
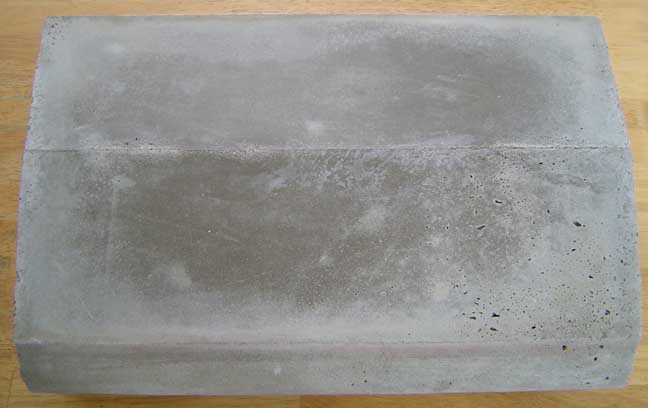 | This is the cast product. You can not really see it, but there is a 3 degree bevel on each side that will make for a nice 6 degrees of arc on each stone, a minute, you might say.
|
|
|

 Lars' Creative Warehouse